Monday, March 10, 2008

Munchie Mondays: Saag Paneer

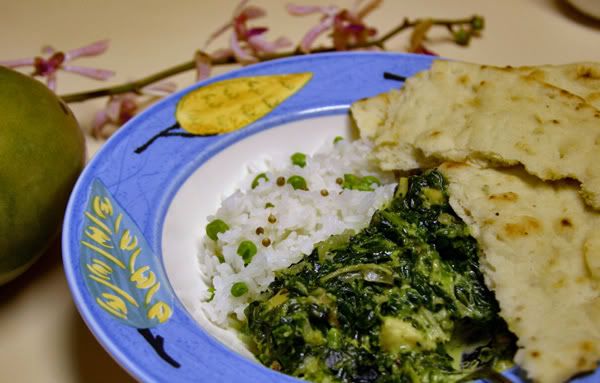
As I mentioned in my previous post, I decided to cook Indian for the Book Club luncheon. Most of what I make was Indian inspired (some would call it "fusion cuisine" and others would say "bastardized"), however, I stuck to a pretty traditional recipe for Saag Paneer, which is essentially Indian Creamed spinach. What makes the dish fantastic however, are the chunks of home made cheese (the "paneer") that swim in the creamy sauce.

You can buy the cheese pre-made in blocks at any good international grocery, however making your own is pretty easy. I used this recipe from the Mahanandi blog for the paneer and as promised, it really did turn out delightful. I personally think using lime juice instead of white vinegar makes the paneer taste better, but that's my opinion. To get the consistency firmer and compacted, make it way ahead of time (say the night before). Be sure to press the cheesecloth bag between two plates and add a weight on top (like a dictionary, fat cat, or perhaps a hubby's foot press) to squeeze out excess moisture.

Use tofu and omit the heavy cream for a vegan version

I have my friend Monika to thank for teaching this dish to me back in high school as well as Avani who helped tweak the spices to make it taste more authentic. As alwaysyou can adjust the spices to taste


Saag Paneer (Palak Paneer)
feeds about 4-6

1 1/2 cups of prepared paneer
4 tbs of olive oil or ghee

1 small onion finely sliced
2 garlic cloves crushed
1 inch cube of ginger finely grated
1 tbs of garlic salt
1/2 tsp of crushed coriander seeds
1 tsp of turmeric
1 tsp of chili poweder
1/2 tsp of cumin
1/2 tsp of fresh grated pepper
1 lb bag of frozen chopped spinach thawed
1 cup of heavy cream

Heat oil in a heavy skillet. Meanwhile cut paneer up into 1 inch cubes and then fry in oil until golden brown. Remove the paneer and set aside. Fry onion in hot oil until wilted and slightly caramelized. Add garlic, ginger and spices and continue to fry until fragrant. Add chopped spinach and mix thoroughly until spinach is heated through.

Carefully add the heavy cream and paneer chunks and cook on medium heat until thick and creamy (roughly 20 minutes)

Serve with Naan and/or jasmine rice.
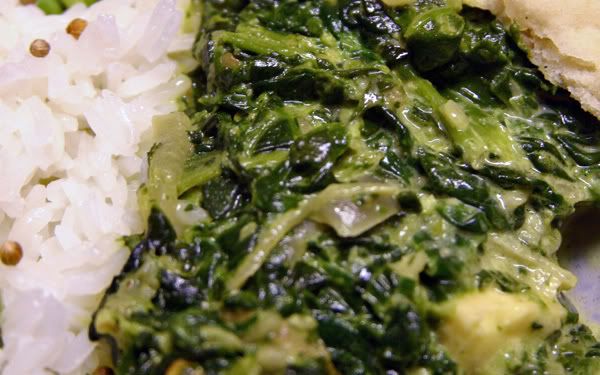


I've had some variants that add chopped tomato to the mixture and that tastes good. Some people also like to use fresh spinach and butter milk. Anyhow, if you try this recipe please tell me how it came out for you and how you'd improve upon it.

Labels: , , , ,

Monday, February 18, 2008

Munchie Mondays: A Hot Cindy Toddy

As you may or may not know, I'm recovering from the flu or maybe it's bronchitis...I'm not sure which. I'm also not sure if this is merely a continuation of the sore throat I had back in January. Point is, I've been sick for ages.

Lately the issue has been waking up in the middle of the night with this super dry, uber ticklish, annoying as hell cough that just kicks you in the gut. Cough hack-hack-hack-hack-hack....I have not gotten enough sleep. I *could* take some Nyquil or some other over the counter medicine, but why bother when there's an age old Scottish solution right in the pantry? If you think about it, this is not too much different from what you'd get at the drug store.

A "Toddy" is technically any sort of hot drink, but here in the States it usually refers to a hot alcoholic beverage that involves whiskey or brandy and some kind type of sweetener plus spice. This is my version.

A Hot Cindy Toddy

2 shots of whiskey (I've got an affection for Bulliet bourbon these days, but I think good ole Jack Daniels would do fine)
juice of half a lemon
1 tbs of honey
some boiling water to top the tumbler
pinch of nutmeg
pinch of ground cardamom

Mix the lemon juice with the honey. Add alcohol. Pour boiling water on top and mix until honey is melted. Serve with spices on top (some people do this with cinnamon sticks are stirrers)

Ta da! Instant cough medicine that'll knock you out in a jiffy so you can get rest. It warms you up. Cleans out the air ways and makes you forget you're sick.

I do not recommend doing this every night when you're ill! By all means, orange juice and plenty of fluids is the way to go. However, if you're at the stage where you're pretty much recovered except for that annoying wheezing gut wrenching night time cough that come out of nowhere, consider imbibing in some good spirits.

Labels: , ,

Monday, February 11, 2008

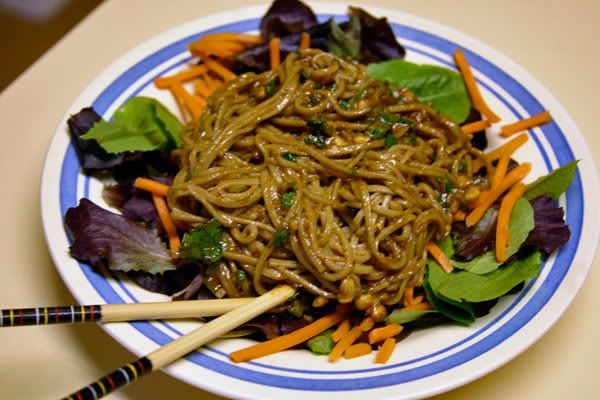
Munchie Mondays: Asian Comfort Food (Peanut Noodles)

This is really quick easy and tasty recipe that packs well for lunches. It's the ultimate in Asian comfort food and I make this disk often for friends who are over my place hanging out.


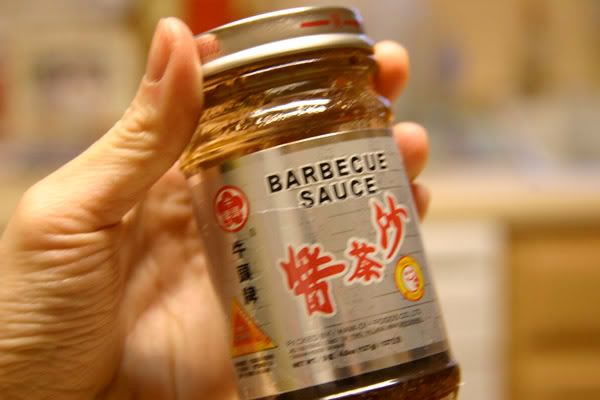
The secret ingredient is Chinese BBQ Sauce. That's what the label says and you can find this brand and its brethren at almost any Asian grocery market. I'm not sure if that is a proper translation, but I've included a pic for reference:


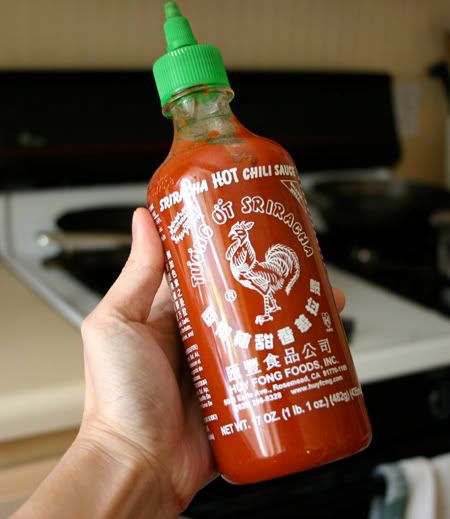
The other ingredient is this hot vinegar based chili sauce that is found often in Vietnamese cooking. Sammi and I call this stuff "Rooster" Sauce. Again, here's a pic for reference:


All the measurements are approximate (which is typical in Asian cooking) so you can adjust things to taste.
Asian Comfort Food (Peanut Noodles)

feeds 1 to 2 people

1 bunch of soba or buckwheat noodles

Sauce:
1/4 cup of peanut butter (chunky or smooth matters not)
1 tbs of Chinese BBQ Sauce
1 tsp of "Rooster" Hot Sauce.
1 tbs of Sesame Oil
2 tbs of Soy Sauce
2 tbs of chopped cilantro
2 tbs of chopped basil
Salt and pepper to taste

1 handful of mixed greens for garnish

Bring 6 cups of water to boil, add soba noodles and cook until tender. Meanwhile thoroughly combine sauce ingredients in bowl. When the noodles are done, dump into bowl and toss gently until noodles are well coated. Serve atop greens.
Is there anything easier than that?

Labels: , , , , ,

Monday, February 04, 2008

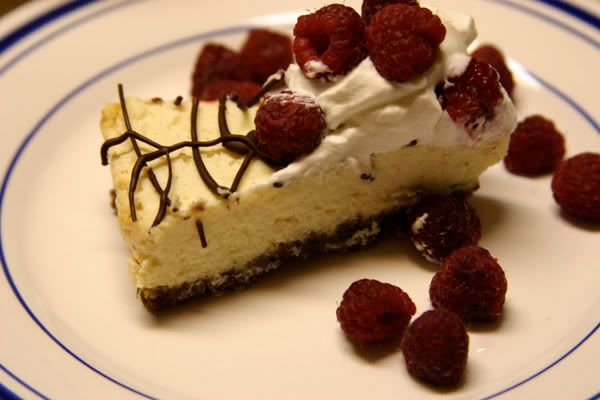
Munchie Mondays: Cindy's Citrus Berry Cheesecake

Remember that night I was craving cheesecake? Well, here's it is!


Frankly, I've never baked one before, but it came out pretty good. I'm darn proud of my cheesecake, yes sirree! At first I thought it might have been too "wet" but ended up setting up nicely in the fridge after it cooled down. I'm assuming that the amount of actual cream cheese can be varied some if you want something a little lighter.

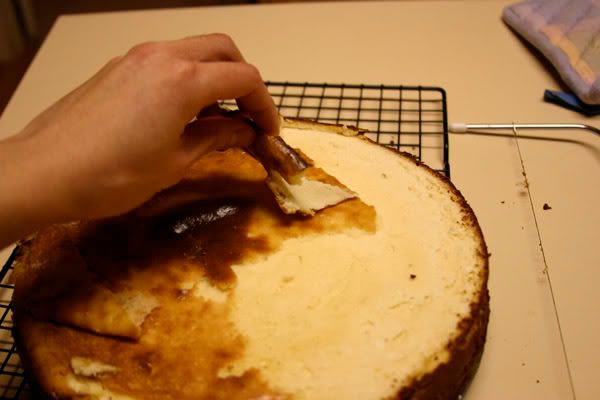
I will say that this cake was incredibly labor intensive and I doubt I'm going to make another one any time soon. However, I suppose it's worth the effort. It is kind of important to either have a cake leveler or be adept at leveling a cake with a sharp knife if you want this to look pretty. I actually didn't know cheese cake came out of the over with a "skin" but that makes perfect sense. The ones you get at a store or buy at a bakery are all prettified. With that said, you do lose a lot of cake when you do that! A friend of mine suggested dumping the scrapings into a vat of home ice cream. Not a bad idea. :)

Cindy's Citrus Berry Cheesecake

crust:
1 cup chocolate graham cracker crumbs (plain works too)
3/4 cup chopped pecans or almonds
1/4 cup sugar
1/4 cup butter, melted

filling:
4 (8 ounce) packages cream cheese, softened
1 (14z) can of condensed milk
4 eggs
juice of one lemon
juice of one lime
1 tsp lemon rind
1 tsp lime rind
1 tsp orange rind

topping:
1/4 c of dark chocolate chips
whipped cream (1/2 cup yielded enough for my topping)
fresh berries (I used raspberries)

Preheat oven to 325 degrees F


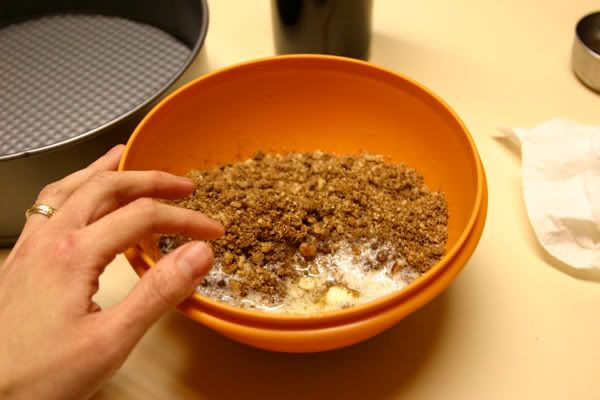
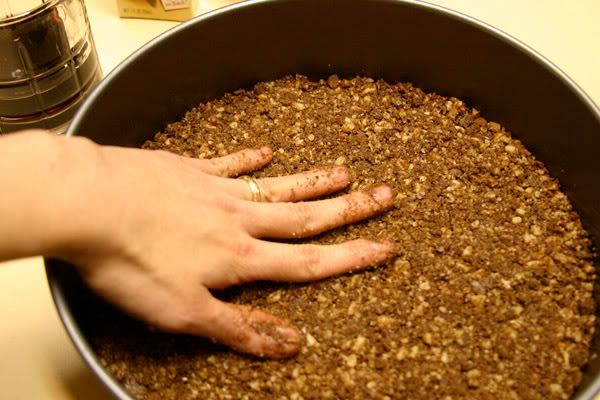
In a bowl combine cookie crumbs with sugar and melted butter. Mix thoroughly until crumbs are moistened. Dump into a 9 or 9/5 inch spring form pan and press crumbs down firmly and evenly to the bottom of the pan:


In another bowl beat cream cheese until fluffy. Add the rest of the ingredients and beat on high or medium speed until well incorporated. Pour into pan.
Place pan atop cookie sheet in case batter spills. Bake for 50 to 55 minutes or until cake is set. You can test this by poking the center with a toothpick.

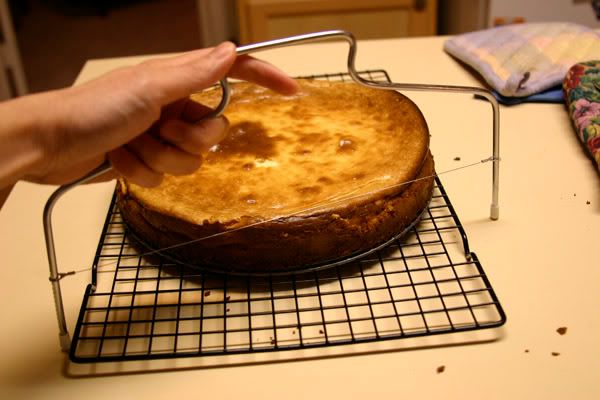
When done, let it cool inside of the pan for 5 minutes. Run a sharp knife around the perimeter of the pan and release cake. Cool a top a wire rack for an additional 10 minutes. Meanwhile, if you so desire, level the cake with a cake lever or sharp knife to remove crust:


Place cheesecake (lightly covered with plastic wrap) in refrigerator and let cool for at least 4 hours. I let my cool and set up overnight. The cake with become much more dense when it settles.

Prior to decorating, wash and dry berries. Melt chocolate chips in a Ziploc baggie by placing bag with chocolate in a vat of hot water. Beat heavy cream on high with a pinch of sugar and vanilla to make whipped cream (or just go to the store and buy some...doesn't matter to me).

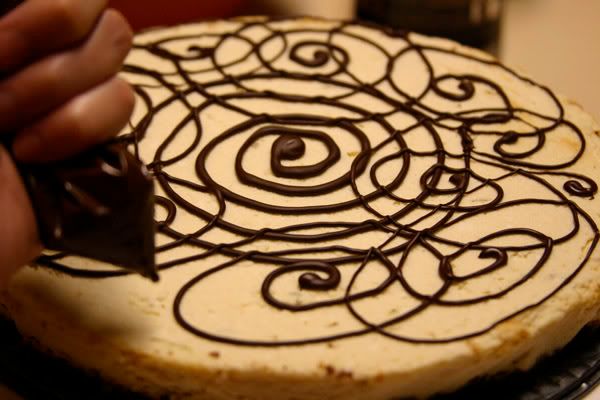
To decorate, snip the end of the ziplock bag and draw designs on top of the cake. You can do whatever you want. You could even skip this step, but the chocolate goes well with the tanginess of the citrus and berry flavors. Some people like to do chocolate shavings instead.


Top with whipped cream and fresh berries and you're good to go! Voila!


Pretty eh? Don't forget to put this back in the fridge after serving lest you get food poisoning or fuzzy mold on your berries. That was the hard lesson I learned. T, my mom and I each only got to eat one slice before I left the thing sitting on the counter.

Labels: , , , , , ,

Friday, November 23, 2007

Munchie Mondays: T's Birthday Banana Muffins with Peanut Butter Chocolate Icing

Yes, I know this is another early Munchie Monday post as it is Friday, however, today is my Darlin Hubby's Birthday! He turns 31 today and except for the increased man-fur, looks pretty much the same as when I first met him nearly 9 years ago. He's out with my brother watching Beowulf in 3-d at the moment. Meanwhile, I've been whipping up a batch of his favorite muffins.

I figured after the movie, T and Jbro will probably want something nice to munch on anyway.


I can't take full credit for the recipe as it is derived from a banana muffin recipe in Betty Crocker's Cookbook, which incidentally was a gift T's Mom gave him ages ago right before he was to head off to college. The intention was to give him a simple guide to cooking to encourage him to acquire good eating habits as a bachelor--ya know, to not consider Ramen, potato chips and peanut butter straight from jar as a full meal. I'm not sure how much use the book he received because by the time we got married (which was some 6 years later after he acquired the text) the spiral bound volume was still pristine. ..however, *I* got a lot of use out of it. The recipes in there work as a perfect base to add/change/tweak into your own dishes which is what I've done here.

The muffins from this book are obscenely easy to make.

T's Birthday Banana Muffins with Peanut Butter Chocolate Icing
makes 12

3 mashed ripe bananas
1 egg
1 tsp vanilla or maple extract
1/3 cup of light brown sugar
3 tbs of vegetable oil
2 cups of Bisquick
1/2 cup of pecans (plus extra for garnish)

Peanut Butter Chocolate Icing
(you will have leftovers)

2 cups of dark chocolate chips
1/2 cup of smooth peanut butter
1/3 cup of whipping cream

Preheat oven to 400 degrees.

Line muffin tin with muffin paper or grease lightly with shortening (I suggest muffin cups because these muffins are light and fall apart easily).

Whisk bananas, eggs, oil, vanilla extract and brown sugar in a bowl. Gently fold Bisquick flour and pecans into wet mixture until just moistened. Do not overmix. Otherwise, you'll get a heavy batter. Spoon mixture evenly amongst the 12 muffin compartments.

Bake for 15 minutes or until golden brown.

Meanwhile, prepare the icing.
Place chocolate chips and peanut butter in a sturdy bowl (glass or ceramic is best as it conducts heat). Heat whipping cream over stove while whisking to aerate the cream. When steamy got (but not boiling) pour over chocolate chips and peanut butter. Continue to beat mixture with whisk until chocolate is melted and everything is well incorporated. It'll be the consistency of a thick pudding.

When muffins are done, remove from pan and cool on a wire wrack.

Spoon icing over the tops and garnish with pecans (or sprinkles, or coconut flakes...or nothing at all). Ta da! Done!

Labels: , , , , , , ,

Monday, November 19, 2007

Munchie Mondays: Borscht Soup Cindy Style


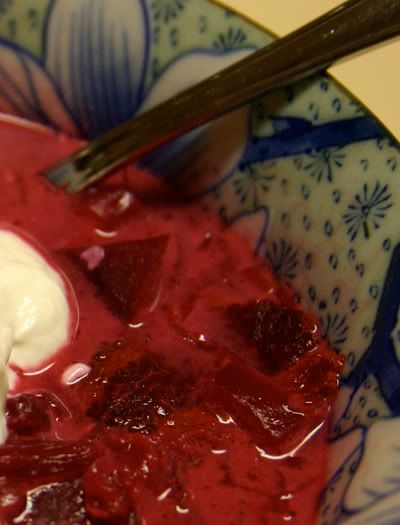
I swear this is a really yummy soup, especially in colder weather. Unfortunately, it's just a pain in the tush to photograph.

My version is definitely an adulterated version of the traditional eastern European dish, but still is a borscht, I assure you. Be sure to use fresh beets. The canned stuff just doesn't cut it because this soup is all about the beets and cabbage. If you hate sauerkraut, feel free to omit and use more red cabbage instead, however the sauerkraut gives the dish a nice tangy flavor that goes well with the sweetness of the beets. You can also made this vegetarian by completely omitting the bacon and using vegetable broth. I sometimes make a heartier version by adding potato.

Fresh dill is also a must for this to taste right.

Like with most soups, exact measurements are not that important.

Borscht Soup Cindy Style
feeds a lot of people (8-10...maybe more)

1 lb of bacon
1 small red onion finely diced
6-8 small-medium fresh beets peeled and sliced
1 small head of red cabbage shredded and rinsed (about 4 to 6 cups)
2 cups of sauerkraut
4 cups of beef broth
2 cups of water
1 1/2 cups of sour cream (plus extra for garnish)
1/4 cup of fresh dill (plus extra for garnish)
Salt and pepper to taste

Fry bacon in a skillet until crisp. Drain on paper towels and reserved about 1 tbs of oil. Place oil in the bottom of a huge ass pot and heat. Fry onion until transparent (if you were to use potato too, this would be the time to fry the potatoes). Add liquids, veggies and bacon. Bring to a boil and then reduce heat and let simmer halfway covered for about 30 minutes or until beets are soft and cabbage is wilted. The soup will take on a gorgeous fuchsia color pretty quickly.

Turn off heat and then mix in the sour cream and dill until dissolved. Serve with a dollop of sour cream, fresh dill and fresh cracked pepper. There you go! A nice hearty soup for the winter months.

Labels: , , , , , ,

Monday, October 22, 2007

Munchie Mondays: Pumpkin Sage Alfredo Sauce


A cold front actually blew in Texas last night. It's a frigid 58 degrees now! (*note the sarcasm*) Still, 58 degrees feels mighty nice after weeks of temperatures in the 90's. It's freaking October. It's supposed to be Fall, so frankly I'm glad fall is finally here.

And course that means it is pumpkin time!

Instead of posting something sweet, I decided to go the savory route this week with my version of a pumpkin sage Alfredo sauce that goes well with pasta, atop poultry or even over Eggs Benedict.


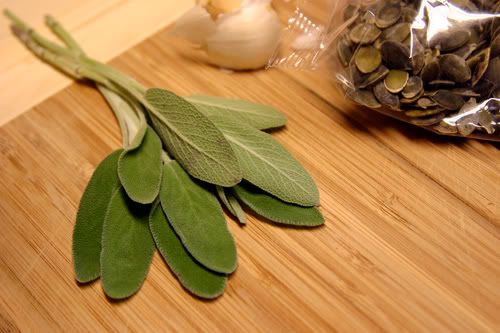
Sage goes really well with pumpkin and chicken. Not surprisingly chicken goes well with pumpkin too.... I will admit I don't cook with sage much because, it's uh...well, weird looking. Spongy and pungent. Silvery. It's kinda like the arrogant cousin of rosemary or something, but I digress. If you can't find fresh sage, dried sage works just fine as well.


Pasta with Pumpkin Sage Alfredo Sauce
feeds 2 to 3

3 cups of prepared pasta

1/4 cup of pumpkin seeds toasted

1/2 cup of heavy cream or half and half
1/2 cup of pumpkin puree
1/4 cup of grated Parmesan cheese
2 tbs of butter
1 tbs of fresh chopped sage (or 1 tsp of dried sage)
2 cloves garlic crushed
pinch of nutmeg (optional)

Salt and pepper to taste

shaved Parmesan or feta for garnish


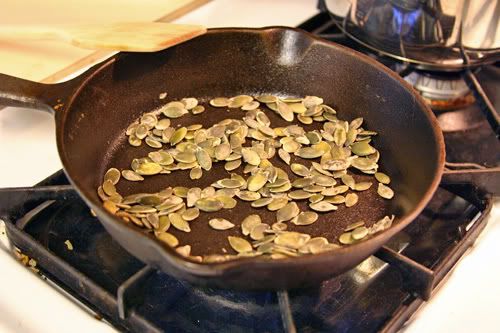
While pasta is cooking, toast shelled pumpkin seeds in a pan until brown and aromatic. You'll actually hear them pop and crackle as they toast.

In a heavy pan add cream, garlic, pumpkin puree, and butter. Whisk over medium heat until butter is melted and there are no pumpkin lumps. Turn off heat and add sage, nutmeg and Parmesan cheese. Mix thoroughly. Season with salt and pepper.

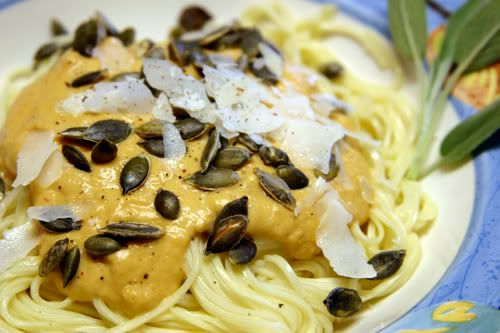
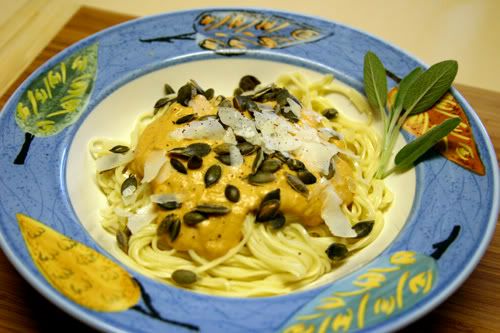
Arrange pasta on plate. Pour sauce on top. Garnish with toasted pumpkin seeds, cheese and fresh ground pepper.

Also goes really well with grilled chicken or bacon crumbles. I'm sure slivered almonds would work for the nuts as well. Yummy!

Labels: , , ,

Monday, September 24, 2007

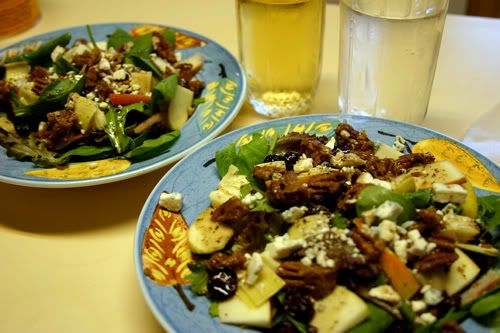
Munchie Mondays: Cindy's Spinach Salad


As Claudia once pointed out, I put pecans into everything and it's true. Pecans grow natively around here and I have pleasant memories from childhood picking up the mature nuts that had fallen off of the bare trees around our house during the fall. I give kudos to my mom for coming up with an activity to keep her kids quiet as cracking these fruits and harvesting the meat was quite a challenge for my brother and I as it required some manual dexterity and concentration.

Another thing I attribute to Fall are tree ripe apples from Ithaca, NY (where I met my hubby.) I spent a short amount of time up there while in graduate school and I still recall being able to buy all sorts of these fragrant beauties by the bucket full on road side stands. The apples I'd seen were smallish, about the size of a lemon but packed with tons of flavor and crunch. You really don't see apples down here like those.

Anyway, as this is technically the first day of Fall, we might as well celebrate by making a salad featuring these fall fruits!

Cindy's Spinach Salad
feeds 2

3/4 cup of shelled pecans
1 tbs of butter
3/4 cup of brown sugar

1/4 cup of dried tart cherries, cranberries or raisins
1/4 cup of crumbled blue cheese
2-3 artichoke hearts roughly chopped
1 small apple (Pink Lady is my favorite)
4 cups of baby spinach
oil and vinegar, salt and pepper for dressing

What makes this salad is the candided pecans. Don't get to bent out of shape with "hard ball" "soft ball" stages with this candy mixture. The longer you cook it, the more hard caramel like it'll be. The shorter time, the more it'll be like a praline. They both tasted good...You just don't want to over cook the mixture!


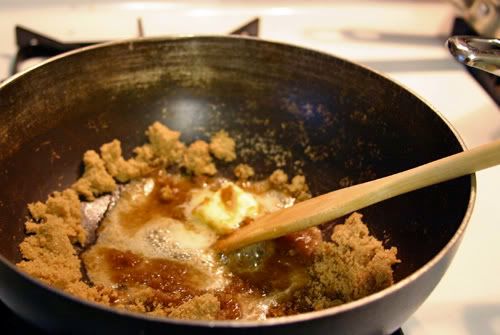
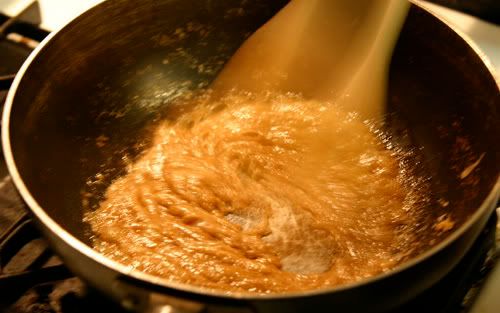
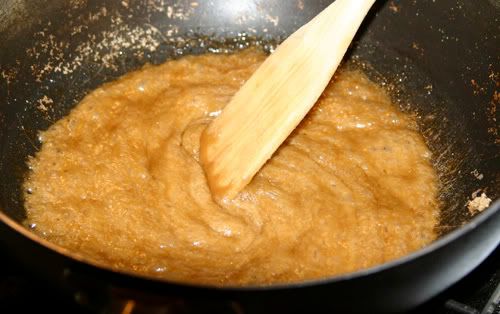
Melt butter and sugar in a heavy skillet over medium heat.


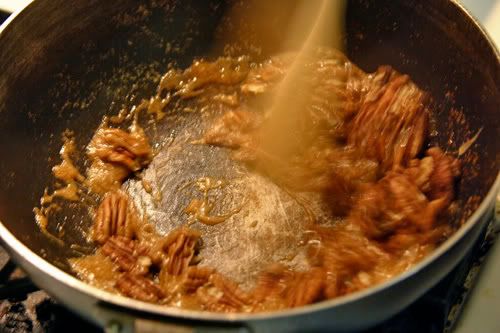
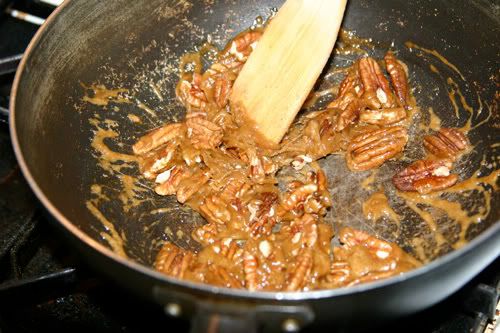
Beat vigorously until fluffy and almost frothy seeming. The butter and sugar should be well incorporated. This is when I add the pecans. Again, stir vigorously until the pecans are well coated.


Dump pecan candies onto wax paper to cool being careful to try to separate the pieces as much as you can. Please don't touch the caramel with your bare hands as you're doing this. As the pecans are cooling, slice apple into thin wedges or cube and arrange salad ingredients between two plates.

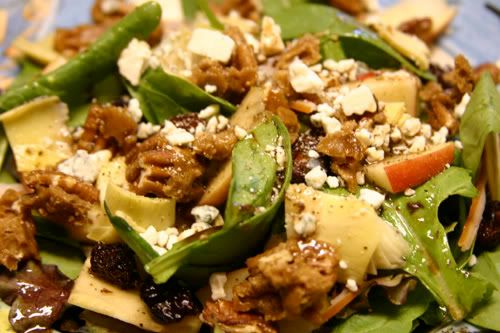
Dress with candied pecans, salt, pepper, oil and vinegar and you're good to go! You'll probably have more candied pecans than you care to use, but that's okay. Just wrap them up with the waxed paper once cooled and stick in the refrigerator. They'll keep for a couple of weeks.

Labels: , , , , , , ,

Saturday, September 15, 2007

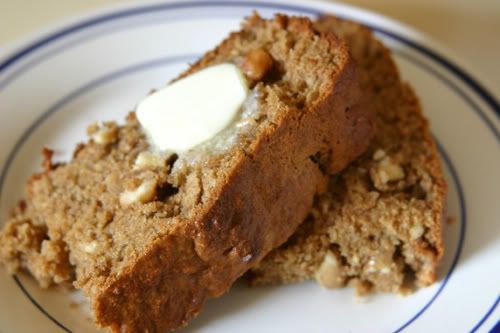
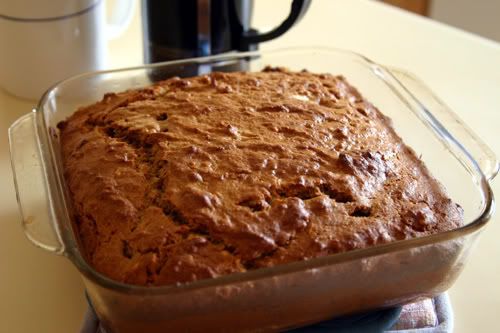
Munchie Mondays: Cindy's Cashew Banana Bread

I know. It's not Monday. But hey, I've got the munchies and actually managed to go grocery shopping a couple of hours ago, so it's all good in the Cindy Household.

JBro's here, so that means we eat well. :) I was going to hold off until Monday to post this recipe, but it came out so good that I just had to share now. It's lovely Sunday brunch fare to me and the cashew butter makes the bread extra dense.


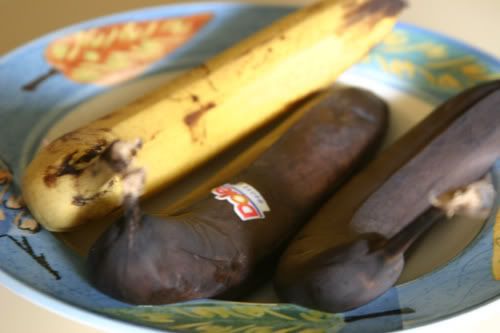
Be sure to use super ripe bananas. Just throw them into the freezer skin and all when they're about to turn and then defrost overnight when you plan on using them. You barely even need to peel them. They bananas just sort fall out of the skins...ewwww I know, but they, they taste great baked!


Cindy's Cashew Banana Bread:

1 stick of butter (softened = 1/2 cup)
1/3 cup of cashew butter
1 cup of brown sugar
1 tsp maple extract
3 mushy bananas
2 eggs
2 cups of whole wheat flour
1 tsp salt
1 tsp baking soda
1/2 cup of coarsely chopped cashews

Preheat oven to 350 degrees. Butter an 8x8 baking dish.

Cream butters and sugar in large bowl. Beat in eggs. Mix in mashed banana and maple extract. Gently stir in flour, salt and baking soda until just moistened. Mix in chopped nuts. Spread into baking dish and bake for roughly 45 mintues at 350 degrees or until tooth pick inserted in center comes out clean. The top of the bread should dome up slightly and be golden brown in color.


Goes great with chocolate syrup or honey and butter. It's great with a big smathering of Nutella as well. You can definitely substitute peanut butter and peanuts for the cashew parts, but I like the subtle sweetness of cashews! Be sure to store in plastic wrap or an air tight container in the fridge otherwise it'll dry out (due to the whole wheat flour).

Labels: , , , ,

Monday, September 03, 2007

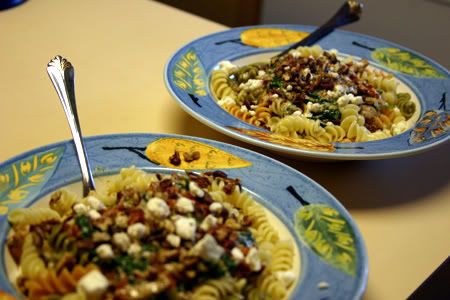
Munchie Mondays: Spiral Pasta with Spinach and Sundried Tomato Alfredo Sauce


This dish is a staple in the Cindy household and I've cooked it for the majority of my friends at one point or another. It's easy, super rich, filling and quick to make. You can add any sort of vegetable you want really. Artichoke hearts, yellow squash, basil, asparagus, fresh tomato and thinly sliced carrots all work well with this sauce.

Spiral Pasta with Spinach and Sun dried Tomato Alfredo Sauce
feeds roughly 2

Two servings of pasta (spiral or shell shapes are best as they hold more sauce)

4 cups of baby spinach
1/3 cup of finely chopped sun dried tomato
1/4 cup of butter
3/4 cup of heavy cream
1/2 cup of grated parmesan cheese

1/4 cup of pecans
1/4 of feta

salt and pepper to taste

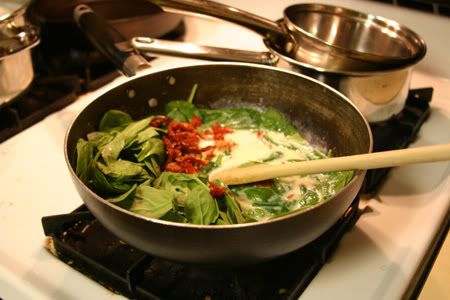
Cook pasta according to package directions. While pasta is cooking, stick butter and cream in a heavy pan. On low heat, whisk the melting butter and cream so that it is thoroughly mixed. You're essentially making an Alfredo sauce (and feel free to adjust cream and butter proportions according to your tastes). However, before adding parmesan, add the baby spinach and sun dried tomato and stir gently until the spinach is wilted.


Once spinach is wilted, turn off heat and immediately add the grated cheese. Stir until well incorporated. The sauce should start to thicken as the cheese melts into the cream and butter mixture.

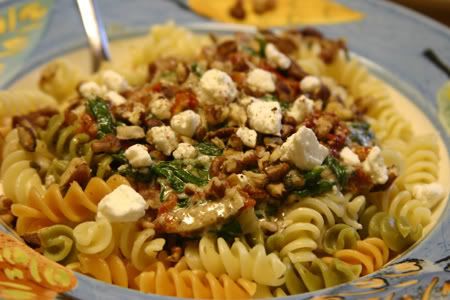
Divided cooked pasta onto two plates and top with sauce mixture. Garnish with pecans and feta. Add salt and fresh ground pepper to taste. Viola! You're done.

Labels: , , , , ,

Monday, August 13, 2007

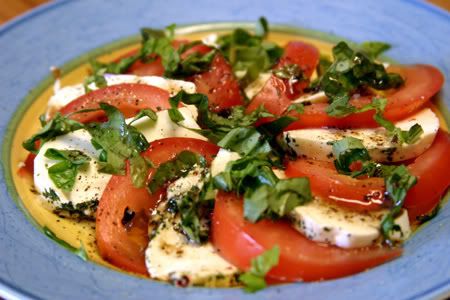
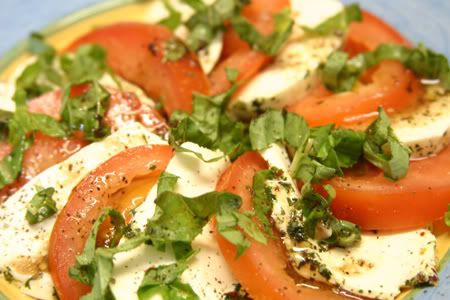
Munchie Mondays: Tomato Basil Mozzarella Salad


So simple and so yummy. There are so many variations on this salad that I feel silly posting this recipe, but eating it brought so much joy to my taste buds, I just had to post! Right about now tomatoes should be growing out the wazoo. I used market roma tomatoes here, but any good tomato will do. If you don't have any sun dried tomatoes on hand (like today, for me), do without, but the fresh basil is necessary for this fragrant and simple salad. Along side rustic bread and some soup, you've got a complete meal. Be flexible with the ingredient amounts. As long as you have equal parts of cheese and fresh tomato, you're good to go.


Tomato Basil Mozzarella Salad
Serves 2

2 small tomatoes or 1 large tomato sliced
10-12 medallion slices of fresh mozzarella
1/4 cup of chopped fresh basil
1/4 cup of chopped sun dried tomato (optional)
Salt and pepper to taste

dressing:
2 tbs extra virgin olive oil
1 tbs balsamic vinegar
1 tbs of red wine vinegar
1 tsp of dried parsely
1 garlic clove crushed

Arrange fresh tomato slices and cheese slices on two plates. Top with basil and sun dried tomato. Mix dressing ingredients thoroughly and then drizzle on top of salad. Add salt and fresh ground pepper to taste. Serve immediately.

Simple eh?

Labels: , , , , ,

Monday, July 16, 2007

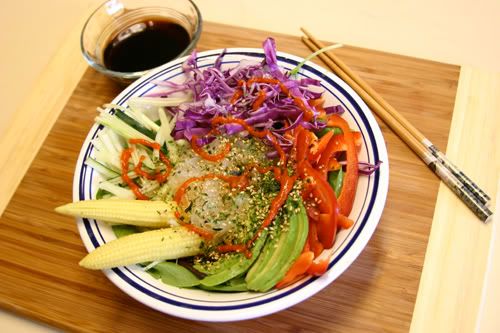
Munchie Mondays: Koriente inspired Noodle Bowl


I've already mentioned before how addicted I am to Koriente's noodle bowls, so it was about time for me to try to figure out the recipe. Granted, I'm going to keep going there for numerous reasons (especially the bubble tea) but for a quick fix, this recipe does the trick.

A word on some of the ingredients....

Sammi and I both refer to this sauce as "Rooster Sauce." I don't know what the proper name is in Vietnamese, but you can find it in Asian super markets and some larger grocery stores pretty easily. It's basically a vinegar based chili sauce and always comes in large squeeze bottles...with a roster on it:


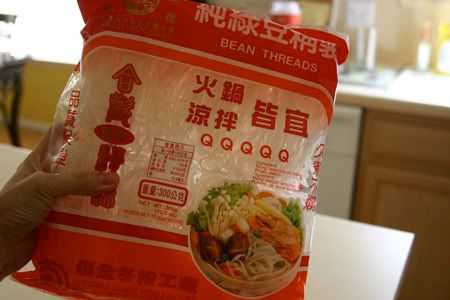
Mung bean noodles or "bean threads" are easily found in Asian super markets as well. You can use rice noodles or sweet potato noodles for this recipe. The idea is to use any sort of noodles in the cellophane category. They've got a chewy texture and are easy to cook.


Word of warning: DO NOT BUY CELLOPHANE NOODLES MADE IN CHINA!!!!

Only buy the ones from Taiwan or Korea because there have been numerous cases of Chinese made bean threads made out of cornstarch instead with a lead extract added to make them look transparent. Frankly, I wouldn't buy any food item from China, but it's really hard to avoid...just my two cents.

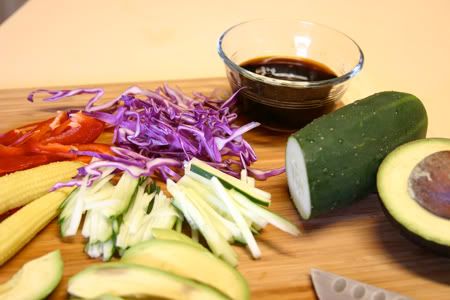
As for vegetables to put into the noodles bowl itself, the possibilities are endless. Aside from the ones listed, I'd also recommend: steamed broccoli, steamed asparagus, cooked shitake mushroom, julienned carrots, etc. You might also consider a tea egg or quail eggs in addition. Don't worry about proportions. What is listed below is just a guideline.

Koriente Styled Noodle Bowls
feeds roughly 2

3 cups total of any of the following vegetables:
shredded red cabbage
thinly sliced red bell pepper
Julienned cucumber
baby carrots
...
1 avocado thinly sliced
2 cups of any type of salad greens
2 tbs of Nori/seaweed flakes (optional)
2 tbs of toasted sesame seeds

two bundles of mung bean noodles
2 tbs of Rooster sauce

Sauce:
1/4 c of Soy Sauce
2 tbs of Rice Wine Vinegar
1/4 tsp of ginger powder


Combine sauce ingredient in a bowl and set aside. In a pot, bring 4 cups of water to a boil and add Rooster sauce to water. This will give the noodles a spicy kick. If you have low heat tolerance, feel free to omit. Boil as long as package instructions suggest. Drain liquid and set aside.

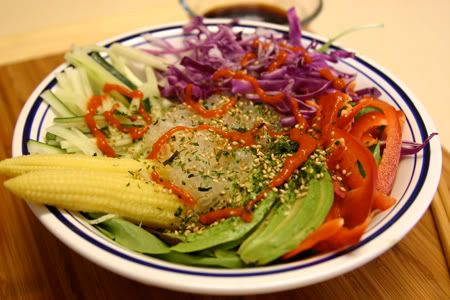
Divide salad greens between two bowls. Mound cooked noodles in the center and then arrange sliced vegetables around the noodles. Garnish with seaweed flakes and sesame seeds and serve with sauce. If desired, squirt more Rooster sauce on top.

Pretty easy eh?

Labels: , ,

Monday, July 09, 2007

Munchie Mondays: Sarah's Chocolate Chip Cookies

Sarah brought these amazing chewy chocolate and peanut butter chip cookies to the party and several people asked for the recipe. Since ballet intensive camp starts up in a week and I gorged on cake, BBQ, alcohol, cheese and chocolate all this past week...and because I'm feeling mighty lethargic, I have to watch what I'm eating so I haven't taken a stab at this cookie recipe yet.

However, I can tell you that they do taste darn good. In fact, I hoarded Sarah's tub full of cookies for most of the party. They sat on my lap as I opened presants (mind you, I made sure others got a cookie too, but as far as I was concerned she made them for me.)

Anyhow, I'll be sure to take photos of the cookies once I bake a batch up, but for now, here's a pic of the trusty recipe originator!


Ain't she cute?

She was kind enough to email me the recipe last week....:)

Sarah's Chocolate Chip Cookies

2 1/8 cups flour
1/2 tsp salt
1/2 tsp baking soda
12 tbsp (one and a half sticks) unsalted butter, melted and cooled slightly
1 cup brown sugar (light, dark, or a mixture of both)
1/2 cup granulated sugar
1 egg
1 egg yolk
2 tsp vanilla extract
1 to 2 cups chocolate chips or chunks (semisweet or bittersweet)

Preheat oven to 325. Line several baking sheets with parchment paper or silicone mats

[note from Sara: I used semisweet combined with peanut butter chips, and i was pretty lax about sticking to the measurement here. I like lots of chocolate! I skipped the parchment paper...the cookies were fine, they didn't stick at all or burn]
In a large bowl, whisk together flour, salt and baking soda, and put aside.

In a large bowl, using an electric mixer on medium speed, beat butter, brown sugar and granulated sugar until thoroughly blended. Mix in egg, egg yolk, and vanilla. Add flour mixture, mixing until just combined. Stir in chocolate chips.

Form scant 1/4 cup dough into a ball. Holding ball using fingertips of both hands, pull ball into two equal halves.

Rotate halves 90 degrees and, with jagged surfaces exposed, join halves together at their base, again forming a single cookie. Be careful not to smooth the dough's uneven surface.

[note from Cindy: I know this sounds weird but it's kind of the same principle as pressing a cookie down with a floured fork to make hash marks and it helps the top surface bake crisp while keeping the center chewy. You just happened to get the benefit of unleashing any pent up anger by ripping apart dough. If it helps imagine some ass hole of a guy you're doing this to...]

Place formed dough onto prepared baking sheets, about 9 balls per sheet. Bake until cookies are light golden brown and outer edges start to harden yet centers are soft and puffy, 15 to 18 minutes. Remove from oven and cool on baking sheets.

Labels: , , ,

Monday, July 02, 2007

Munchie Mondays: Party Food!


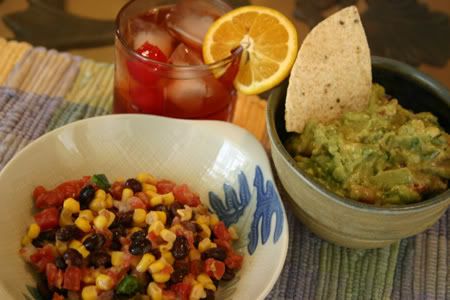
You don't get just one, but THREE recipies today! These were all items that I served up during my kick ass 30th birthday party (post forth coming).

First up we've got the Cindy Kiss. Yes, I made up the recipe some time ago. The joke being that it's red, kinda sweet, complex, easy to manage, but has a little bit of a bite to it.


Cindy Kiss Cocktail
serves 1 or 2 depending

1 shot of gin
1 shot of bourbon
1/2 shot of dark Jamaican rum
1/2 shot of Grenadine
1 shot of peach nectar

Combine above ingredients in a shaker with a couple of ice cubes until well encorporated. Pour over ice into tumbler and top off with sparkling water.


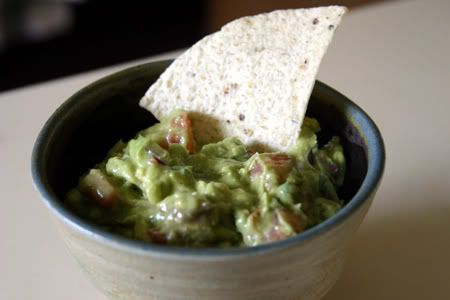
Guacamole
Serves 8

3 large ripened hass avacados
1 medium tomato
1 small red onion
1 bunch of cilantro chopped
juice of 2 limes
juice of 1 lemon
2 cloves of garlic crushed
1 tbs of garlic salt (or more for taste)
1 tsp of black pepper (or more for taste)
1/4 of tomatillo salsa
1 jalapeno pepper finely chopped (optional)

Combine all ingredients in a bowl and mash with fork or potato masher. Cover and chill for at least 30 mintues to let ingredients to combine. Serve with corn chips.


This is a SUPER EASY recipe that tastes great, packs well for pot lucks and makes a nutritious meal served atop rice.

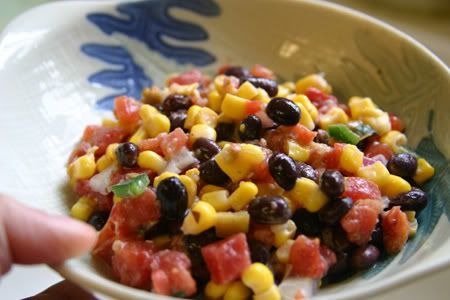
Bean and Corn Salad
Serves 6

1 can of black beans rinsed and drained.
2 can of corn drained
1 can of diced tomatoes drained
1 poblano pepper finely chopped
1/2 small onion finely chopped
1/2 cup of cilantro finely chopped
1/2 cup of sour cream
black pepper for taste

Comine all ingredients in a bowl, cover and refrigerate for at least 30 minutes to let flavours combine.

Labels: , , , , , ,

Monday, June 18, 2007

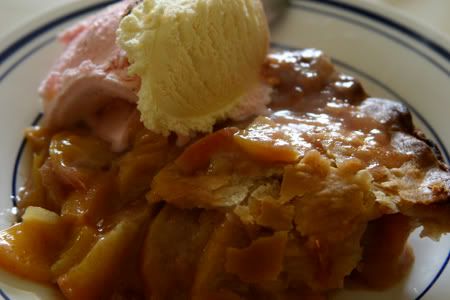
Munchie Mondays: Cindy's Peach Pie


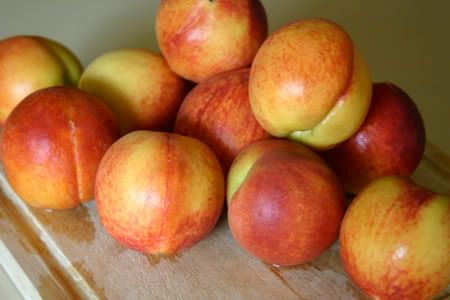
It's peach season in Texas right now and I've got to say this year is a pretty decent batch. Texas peaches tend to be smaller and more fragrant than their usual grocery store counter parts (normally from California) with a pinkish yellow flesh speckled with red that comes off of the pit easily ("free stone). Despite the size their flavor and flowery aroma is really unmatched compared to other peaches I've had.

For this recipe I like to use lime juice instead of the typical lemon juice because I feel like it really enhances the flavor. I like my peach pies on the tart side, so feel free to increase the sugar content up to an additional 1/3 cup if you want a sweeter pie.


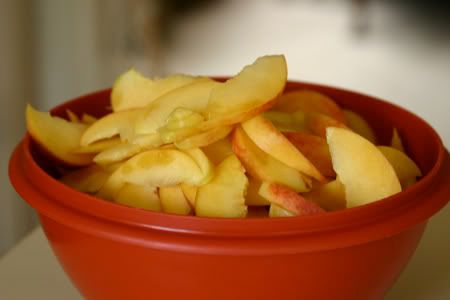
I like to mix up super ripe peaches with those that are under ripe (they still tend to be sweet) for mouth feel purposes. Also, don't worry about peeling them. If you slice them thin enough the skin gives a nice color to the filling

Cindy's Peach Pie (serves 8...although I ate half a pie myself)

Ingredients:
2 prepared pie crusts (one in dish, one to cover)
5 cups of thinly sliced peaches (or about 10-12 small to medium sized fruit)
1/3 cup of whole wheat flour
1/3 cup of firmly packed brown sugar
1/4 cup of granulated sugar
juice of 1 lime
1/4 tsp cinnamon
1/4 tsp nutmeg
pinch of salt
1 tbs of butter

Instructions:
Preheat oven to 425 degrees Fahrenheit.
Slices peaches thinly (1/8 inch of thinner) into a large bowl. Immediate squeeze lime juice over peaches and toss gently to prevent browning.


In another bowl, mix wheat flour, sugars, spices and salt thoroughly. Sprinkle over peaches and toss gently so that peach slices are covered with sugar mixture.

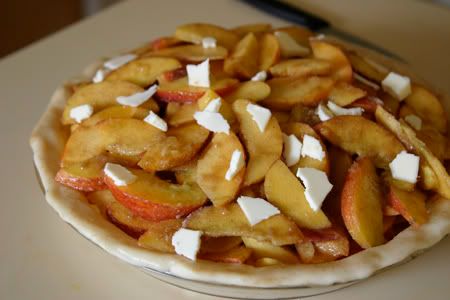
Add the pie filling to one of the prepared pie dishes ensuring that peach slices are lying flat or packed in rather firmly. This'll help the cook the filling more evenly. Dot with slivers of butter.


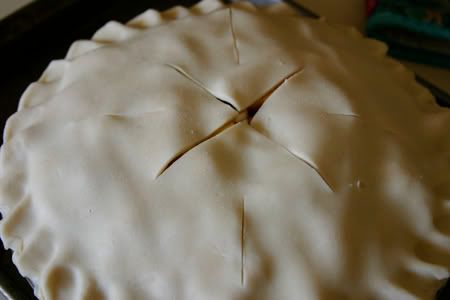
Cover mixture with another pie crust. Seal and flute edges and cut ventilation holes into top crust.


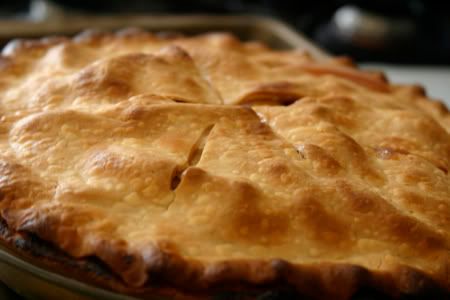
Place the pie into a preheated oven and bake for about 1 hr or until the juices are bubbling out of the top crust. I suggest placing the pie plate on a cookie sheet for this reason. By the way, you should put strips of aluminum foil on the fluted edge and remove 20 minutes prior to finish, but I just always forget. If you make the fluted edge thick enough, it won't burn too badly.

This goes really well with a scoop or ice cream or a doused in half and half.

Labels: , , ,

Monday, June 04, 2007

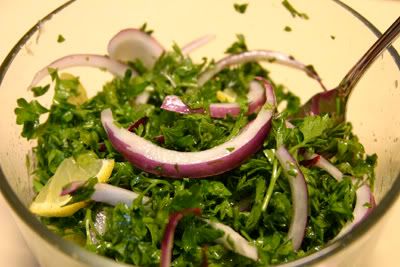
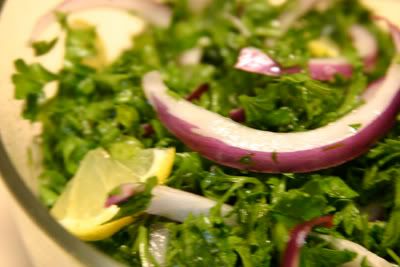
Munchie Mondays: Moroccan Parsley Salad


Do you seriously put sliced lemon, pith and all into this salad?

I get that question all the time and yes, you do and yes, it tastes just fine. I'm referring to a fairly typical Moroccan salad whose predominant ingredients are parsely and lemon. Sometimes you'll see this type of salad with chunks of sardines in it, but I decided to go without. Instead, it makes a great accompaniment with fish due to it's fresh and strong flavor.

Because the skin of the lemon is eaten, make sure to select unblemished fruit, preferably organic and unwaxed. Parsley can be curly leaf or flat (I like flat more but did not have any one hand). Don't worry too much about exact measurements. As long as you've got more parsley than lemon, you're good to go.

Moroccan Parsley Salad
serves 4

Ingredients:
1 bunch of parsley finely chopped
juice of 1 lime
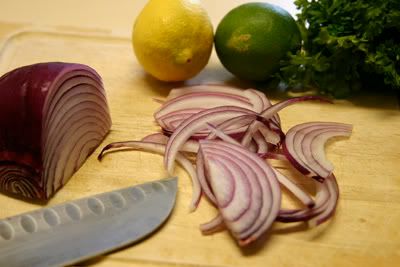
1 lemon (1/2 juiced, the other half cut into paper thin slices skin and all)
1/3 cup of red onion thinly sliced or finely chopped
1 clove garlic crushed
3 tbs of olive oil
pinch of black pepper
1/2 tsp of salt


In a small bowl whisk citrus juices, olive oil, crush garlic and spices together. In a larger bowl lightly toss parsely, onion and lemon slices. Drizzle dressing on top and gently toss. Let sit for 30 minutes either in the refrigerator or at room temperature to allow flavors to mingle. I personally like this salad at room temperature. You can store it in an air tight container for up to a day.

This really good on a hot summer day with grilled or fried fish (course, it's hailing outside like crazy as I type this...)

Labels: , ,